Window decals can add a personal touch to your car, showcasing your interests and style. However, there comes a time when you might want to remove or replace them, whether due to wear and tear or changing preferences.
The prospect of removing window decals might seem daunting, but with the right approach, it can be a straightforward process that leaves your car looking fresh and clean. In this guide, we'll walk you through the step-by-step process of effectively removing window decals from your car, without causing damage to the glass or paint.

Why Removing Decals Requires Care
Window decals are designed to adhere firmly to surfaces, which is great for their intended purpose but can make removal tricky. If not done correctly, the process can result in residue, scratches, or even shattered glass. It's essential to approach the task with patience and the right tools to ensure a successful outcome.
Why Are These Stickers So Hard To Remove?
Car sticker decals can be remarkably challenging to remove due to their adhesive nature and the various environmental factors they are exposed to. These decals are designed to adhere firmly to surfaces and withstand elements like wind, rain, and sunlight.
As a result, their adhesive tends to become stronger over time, making them resistant to easy removal. Additionally, improper removal techniques can lead to adhesive residue, scratches, or damage to the underlying paint or glass. This combination of adhesive strength and potential for damage requires a careful and patient approach when removing car sticker decals.
Gathering Your Supplies: What You'll Need
Before you start, gather the necessary tools and supplies to make the removal process smoother. You'll need:
- Razor Blade or Plastic Scraper: A razor blade or plastic scraper will be your primary tool for lifting the edge of the decal.
- Heat Source: A heat gun, hairdryer, or even hot water can help soften the adhesive, making it easier to peel off the decal.
- Rubbing Alcohol: Rubbing alcohol is effective in removing any leftover adhesive residue after the decal is off.
- Microfiber Cloth: A soft microfiber cloth will help you wipe away residue and maintain the car's finish.
Step-by-Step Removal Process
Removing stubborn stains, sticky residues, or unwanted decals can often feel like a challenging task. Whether it's a residue left by an old sticker on your car, a stain on your favorite shirt, or the remnants of adhesive on a glass surface, a step-by-step removal process can be your solution.
We'll take you through a comprehensive and detailed step-by-step removal process that can be applied to various scenarios. Let’s take a closer look at the following:
Heat the Decal
Begin by using a heat source (heat gun or hair dryer) to warm up the decal. The heat softens the adhesive, making it easier to peel off. Be cautious not to overheat the area, especially if you're using a heat gun.
Lift the Edge
Once the decal is heated, use a razor blade or plastic scraper to gently lift the edge of the decal. Start at a corner and work slowly, keeping the blade parallel to the glass to avoid scratching it.
Peel Carefully
As you lift the edge, continue applying heat to the area you're peeling. Slowly and steadily peel the decal off the glass, maintaining a 45-degree angle. If you encounter resistance, apply more heat to soften the adhesive.
Remove Residue
After the decal is off, you might notice adhesive residue on the glass. Apply rubbing alcohol to a microfiber cloth and gently rub the residue until it comes off. Avoid using abrasive materials that could scratch the glass.
Clean the Glass
Finally, clean the glass with glass cleaner to remove any remaining residue or streaks. This step ensures your car's window looks spotless after decal removal.
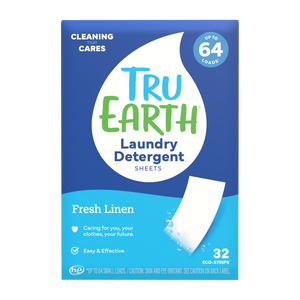
Tru Earth's Multi-Surface Cleaner: An Eco-Friendly Option
If you're concerned about using chemical-based products on your car's windows, consider Tru Earth's Multi-Surface Cleaner. This eco-friendly cleaner is formulated to remove tough residues and stains without harming the environment or your car's surfaces.
Its gentle yet effective cleaning action makes it a great option for removing adhesive residue left behind by decals. Just apply a small amount to a microfiber cloth and gently rub the residue until it disappears. Tru Earth's Multi-Surface Cleaner is a testament to modern cleaning solutions that prioritize both effectiveness and sustainability.
Finishing Touches and Maintenance
After successfully removing the decal and residue, you might want to give your car's windows a thorough cleaning to ensure they're crystal clear. Regular maintenance, including washing your car and keeping the windows clean, can prevent adhesive residue from building up in the future.

A Fresh Start for Your Car's Windows
Removing window decals from your car might seem like a challenging task, but with the right approach and tools, it can be accomplished smoothly.
By following the step-by-step process and utilizing eco-friendly solutions like Tru Earth's Multi-Surface Cleaner, you can transform your car's windows and give them a fresh, clean appearance. Remember, patience and careful execution are key to achieving the desired results while maintaining the integrity of your car's surfaces.