The kitchen oven, a cornerstone of culinary adventures and hearty family meals, often bears the brunt of grease splatters, food residue, and accidental spills. While commercial oven cleaners promise quick fixes, there's a more natural and environmentally friendly way to achieve a spotless oven.
In this comprehensive guide, we're about to unveil a step-by-step approach to leave your oven gleaming without relying on oven cleaners. Embrace the journey towards a sparkling oven that's both inviting and efficient.

The Basics Of Dirty Ovens
Oven grime doesn't discriminate – it accumulates over time, affecting both appearance and performance. Residue from a hearty lasagna bubbling over, the chicken roast that sizzled a bit too much, and that delectable pie that decided to escape its dish – all these incidents contribute to turning your once-pristine oven into a less-than-pleasant sight.
Moreover, the buildup can have a tangible impact on the oven's heating efficiency, potentially affecting your culinary creations. But worry not, for this guide is here to help you tackle the grime head-on and restore your oven's former glory.
Method 1: Baking Soda Magic
Baking soda, the unassuming household hero found in your pantry, takes center stage in this method. To initiate the cleaning ritual, begin by gently removing the oven racks and any detachable parts. Then, create a paste by combining baking soda with water until it forms a smooth, spreadable consistency.
With a gentle touch, coat the interior of your oven with this paste, making sure to avoid any contact with the heating elements. Afterward, allow baking soda's magic to work wonders by letting the paste sit overnight or for at least 12 hours. During this period, the baking soda diligently breaks down stubborn residue, making it more manageable.
Method 2: Vinegar Power
Vinegar, a kitchen staple often associated with salad dressings, partners with baking soda to create a potent cleaning duo. Once you've allowed the baking soda paste to work its magic, it's time to roll up your sleeves and start the cleansing process. Use a damp cloth to gently wipe away as much of the softened residue as possible.
Then, mix equal parts water and white vinegar in a small but mighty spray bottle. With careful aim, spray the interior of the oven with this vinegar solution, directing your attention toward any lingering baking soda residue. Prepare to be mesmerized as a fizzing reaction occurs – this chemical ballet effectively lifts the grime, making it significantly easier to wipe away.
Method 3: The Power of Steam
Steam, with its gentle yet effective nature, is a game-changer when it comes to loosening those tenacious stains. You'll be boiling a pot of water for this method – a simple yet transformative step. After you've filled the pot and set it to boil, carefully place it inside the oven. With a confident flourish, close the oven door and let the steam take center stage for about 20 minutes.
During this time, the steam's miraculous touch softens the residue, rendering it remarkably more pliable and cooperative. Once the steam has performed its enchanting act, use a cloth soaked in water to tenderly wipe down the oven's interior, gently coaxing away the loosened grime.
Method 4: Tackling the Oven Racks
Ah, the oven racks – often overlooked, these sturdy companions of culinary creation are notorious for accumulating layers of grime. To commence cleansing these vital components, prepare a luxurious bath for them.
Fill your bathtub or a generously sized sink with warm water and a dash of mild dish soap, creating a soothing environment for your racks to unwind. Submerge the racks in this concoction and let them soak for a few hours, or even better, overnight. After the allotted soaking time, equip yourself with a non-abrasive scrubbing pad or perhaps an old toothbrush.
With a gentle yet determined approach, lovingly scrub away any remaining residue, allowing the soapy water to witness the transformation. Once you're satisfied, rinse the racks thoroughly, ensuring no soap residue lingers, and then place them aside to air dry. Only when they're thoroughly dry should they be lovingly reintroduced to their rightful place within the oven.
Method 5: The Final Flourish
With the grime banished and the oven racks shining, it's time for the final touch that elevates the cleaning process to an art form. In this final phase, the simple act of dampening a clean cloth with water becomes a statement of accomplishment.
Gently yet purposefully, use this cloth to wipe down the oven's interior, ensuring no trace of baking soda or vinegar lingers. As you navigate the contours and corners of the oven, you'll find that this last act serves as both a practical measure and a ceremonial gesture, signifying the culmination of your efforts.
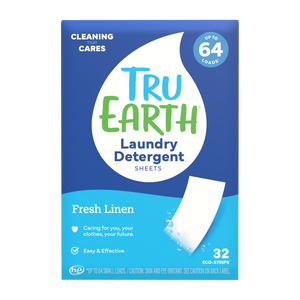
Tru Earth's Multi-Surface Cleaner: A Convenient Option
In your journey to a cleaner oven, one cannot help but appreciate the convenience Tru Earth's multi-surface cleaner brings. While the guide thus far has meticulously explored effective DIY methods, it's essential to acknowledge that life is often a harmonious blend of convenience and commitment.
As you venture into the world of sustainable cleaning solutions, you might find that this cleaner from Tru Earth aligns with your values and aspirations. With careful consideration and an informed decision, you can decide whether to introduce this product into your cleaning arsenal. Should you choose to do so, simply follow the instructions thoughtfully provided on the bottle. Remember, in the realm of cleaning, it's not just about the outcome but also the journey you embark upon.
Preventive Measures: Maintaining a Sparkling Oven
While the transformative methods shared here have given you the tools to restore your oven's gleam, it's only natural to want to sustain this newfound radiance. Prevention is the unsung hero in this narrative. As you embark on your culinary expeditions, consider placing a protective barrier in the form of a baking sheet on the bottom rack. This simple addition can catch drips, spills, and unexpected splatters, sparing your oven from unsightly stains.
Additionally, cultivate the habit of wiping down the oven after each use. This practice might seem minor, but it goes a long way in preventing residue from building up and solidifying its hold. For the days when culinary experiments involve simmering sauces or bubbling batters, embrace the idea of using oven-safe containers and covering dishes as they cook. By adopting these preventive measures, you can prolong the pristine state of your oven and minimize the need for intensive cleaning sessions.

A Bright and Shiny Culinary Partner
As you stand before your oven, its interior now gleaming and inviting, take a moment to reflect on the journey you've undertaken. The spotless oven isn't just about aesthetics; it symbolizes your commitment to maintaining a clean and efficient kitchen space.
With the methods detailed in this guide, you've demonstrated that a little knowledge and effort can go a long way in transforming even the most challenging cleaning tasks. The choice to eschew harsh chemicals and embrace natural cleaning methods speaks volumes about your values and dedication to a healthier living environment.